
Web Connect
Web Connect is a widget that can be placed on your company website, allowing customers to start conversation threads, centralizing communications into one platform.
- Customers can ask questions directly to counter reps from your website
- Capture engagements from your company website
- Capture new leads/customers from your website
- Enable showrooms to more efficiently reach out to DIY customers who commonly interact via website
- Administrators will have a section in settings to access the code for the web connect widget to be added to their websites.
- Administrators can request multiple widgets relating to different groups and place them in different locations.
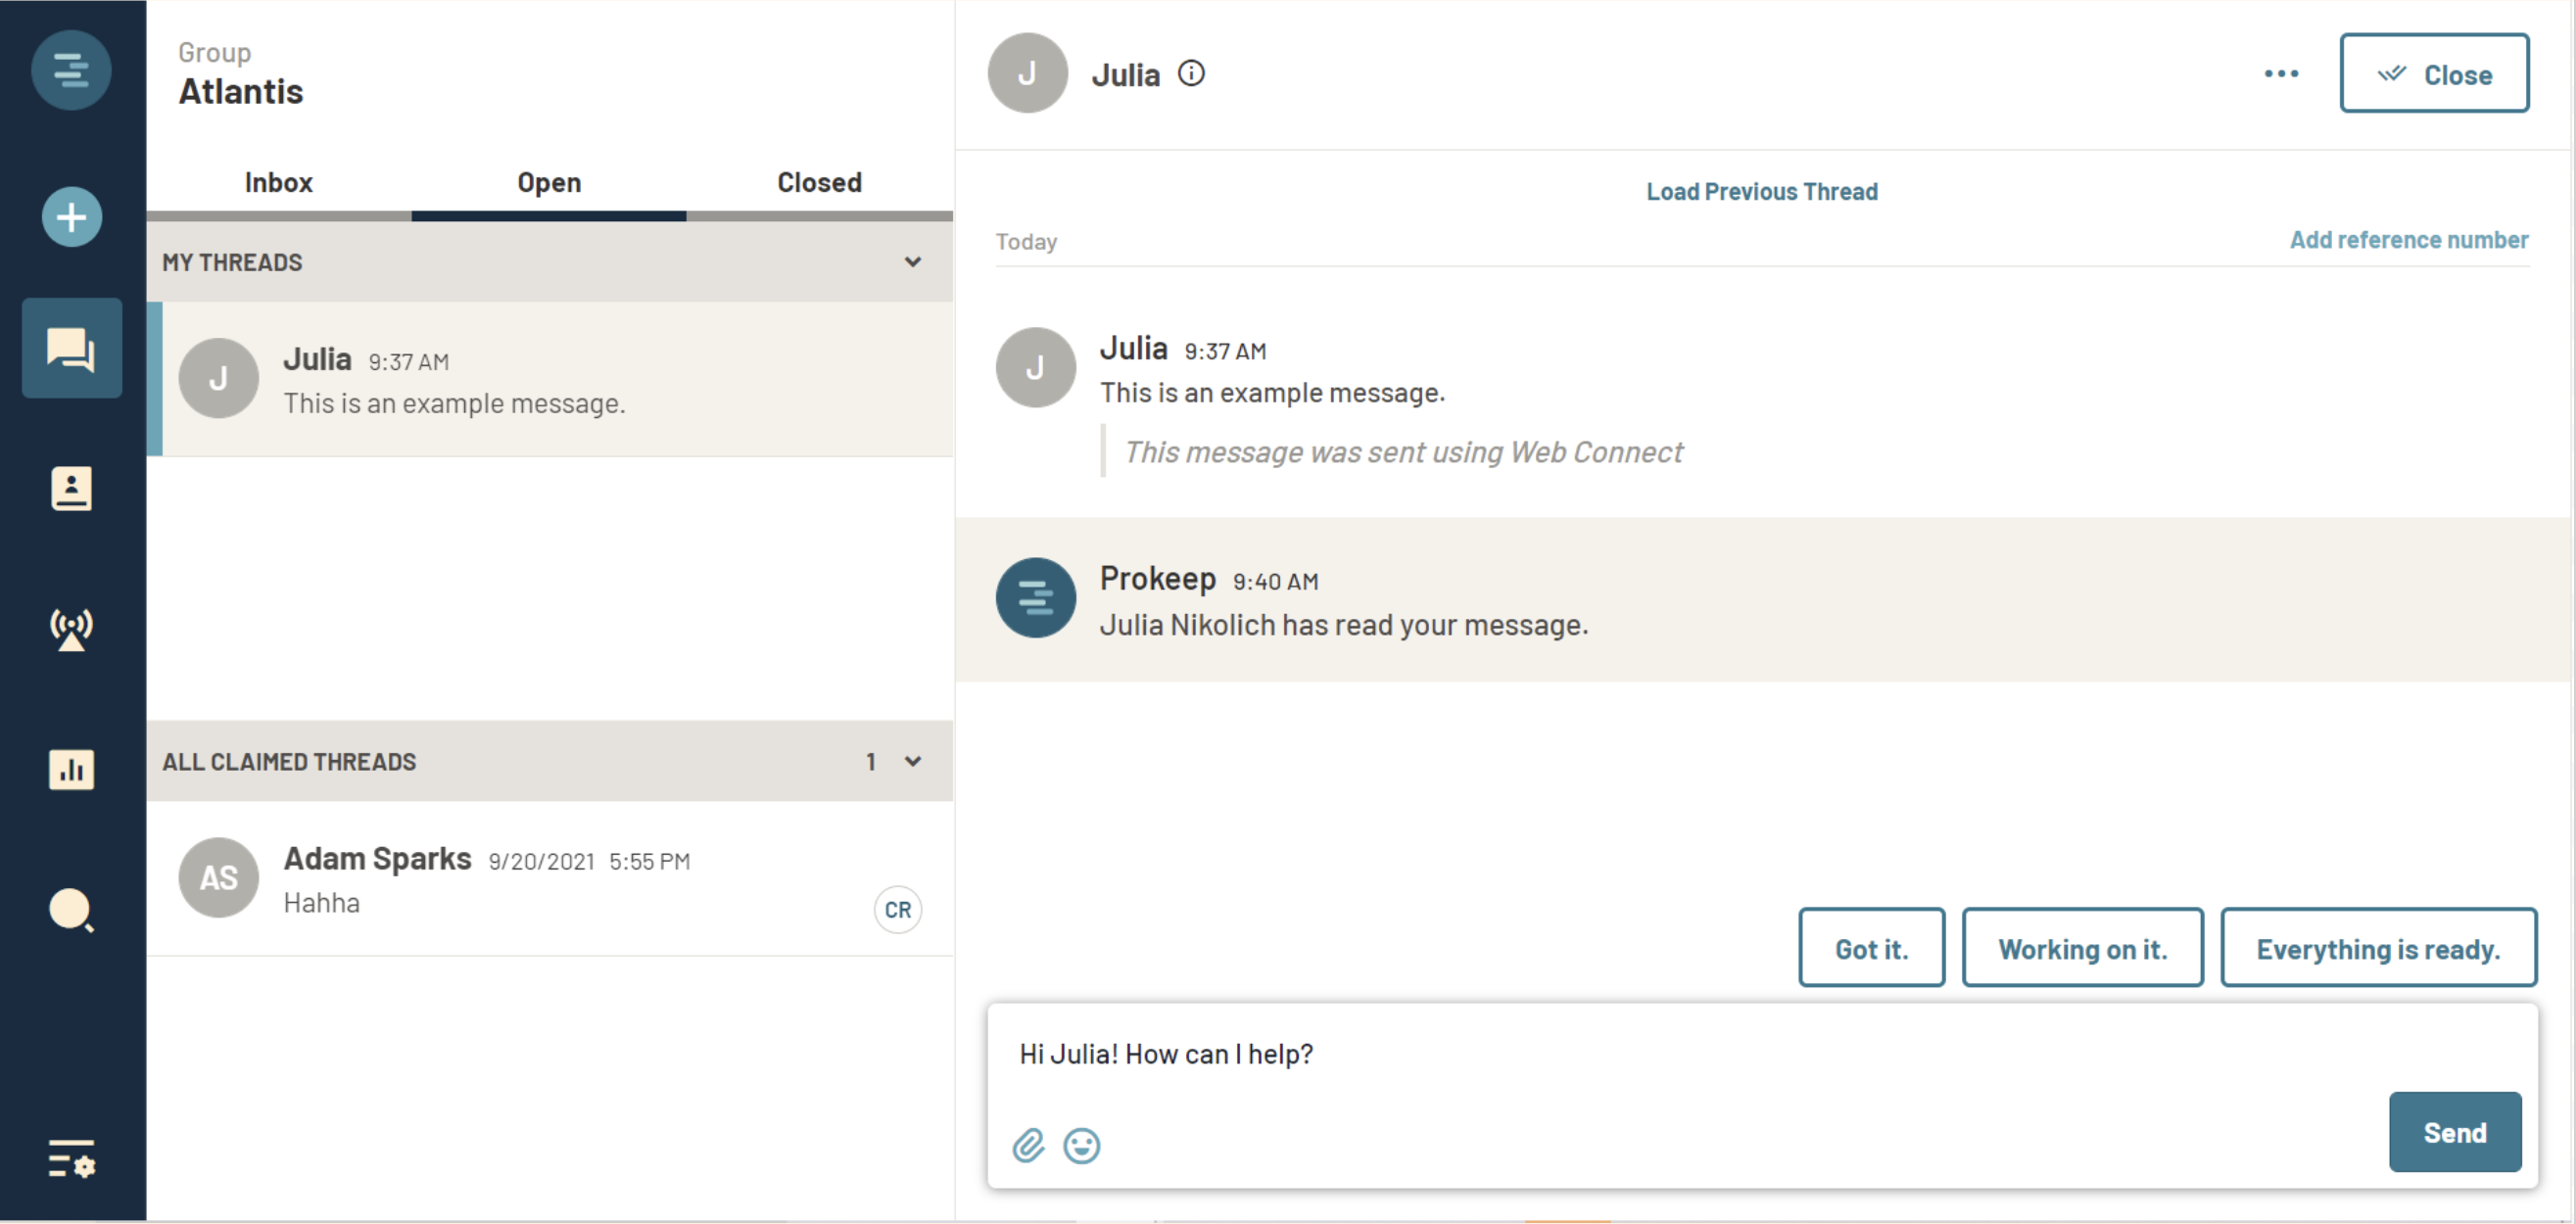
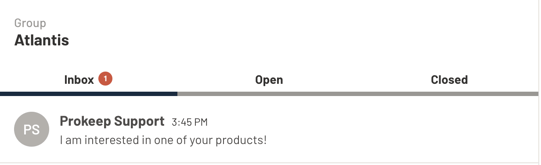
- Conversations begun in the web connect widget will have an automatic message at the top of the conversation indicating them as such.
- To prevent spam, customers will be asked to verify their message before it reaches your Prokeep Inbox.
Web Connect Training Video:
How to Enable on Your Website:
- Administrators will be able to go into Settings and then to Web Connect.
- From there, you will copy the code of the widget(s) you would like added to your website.
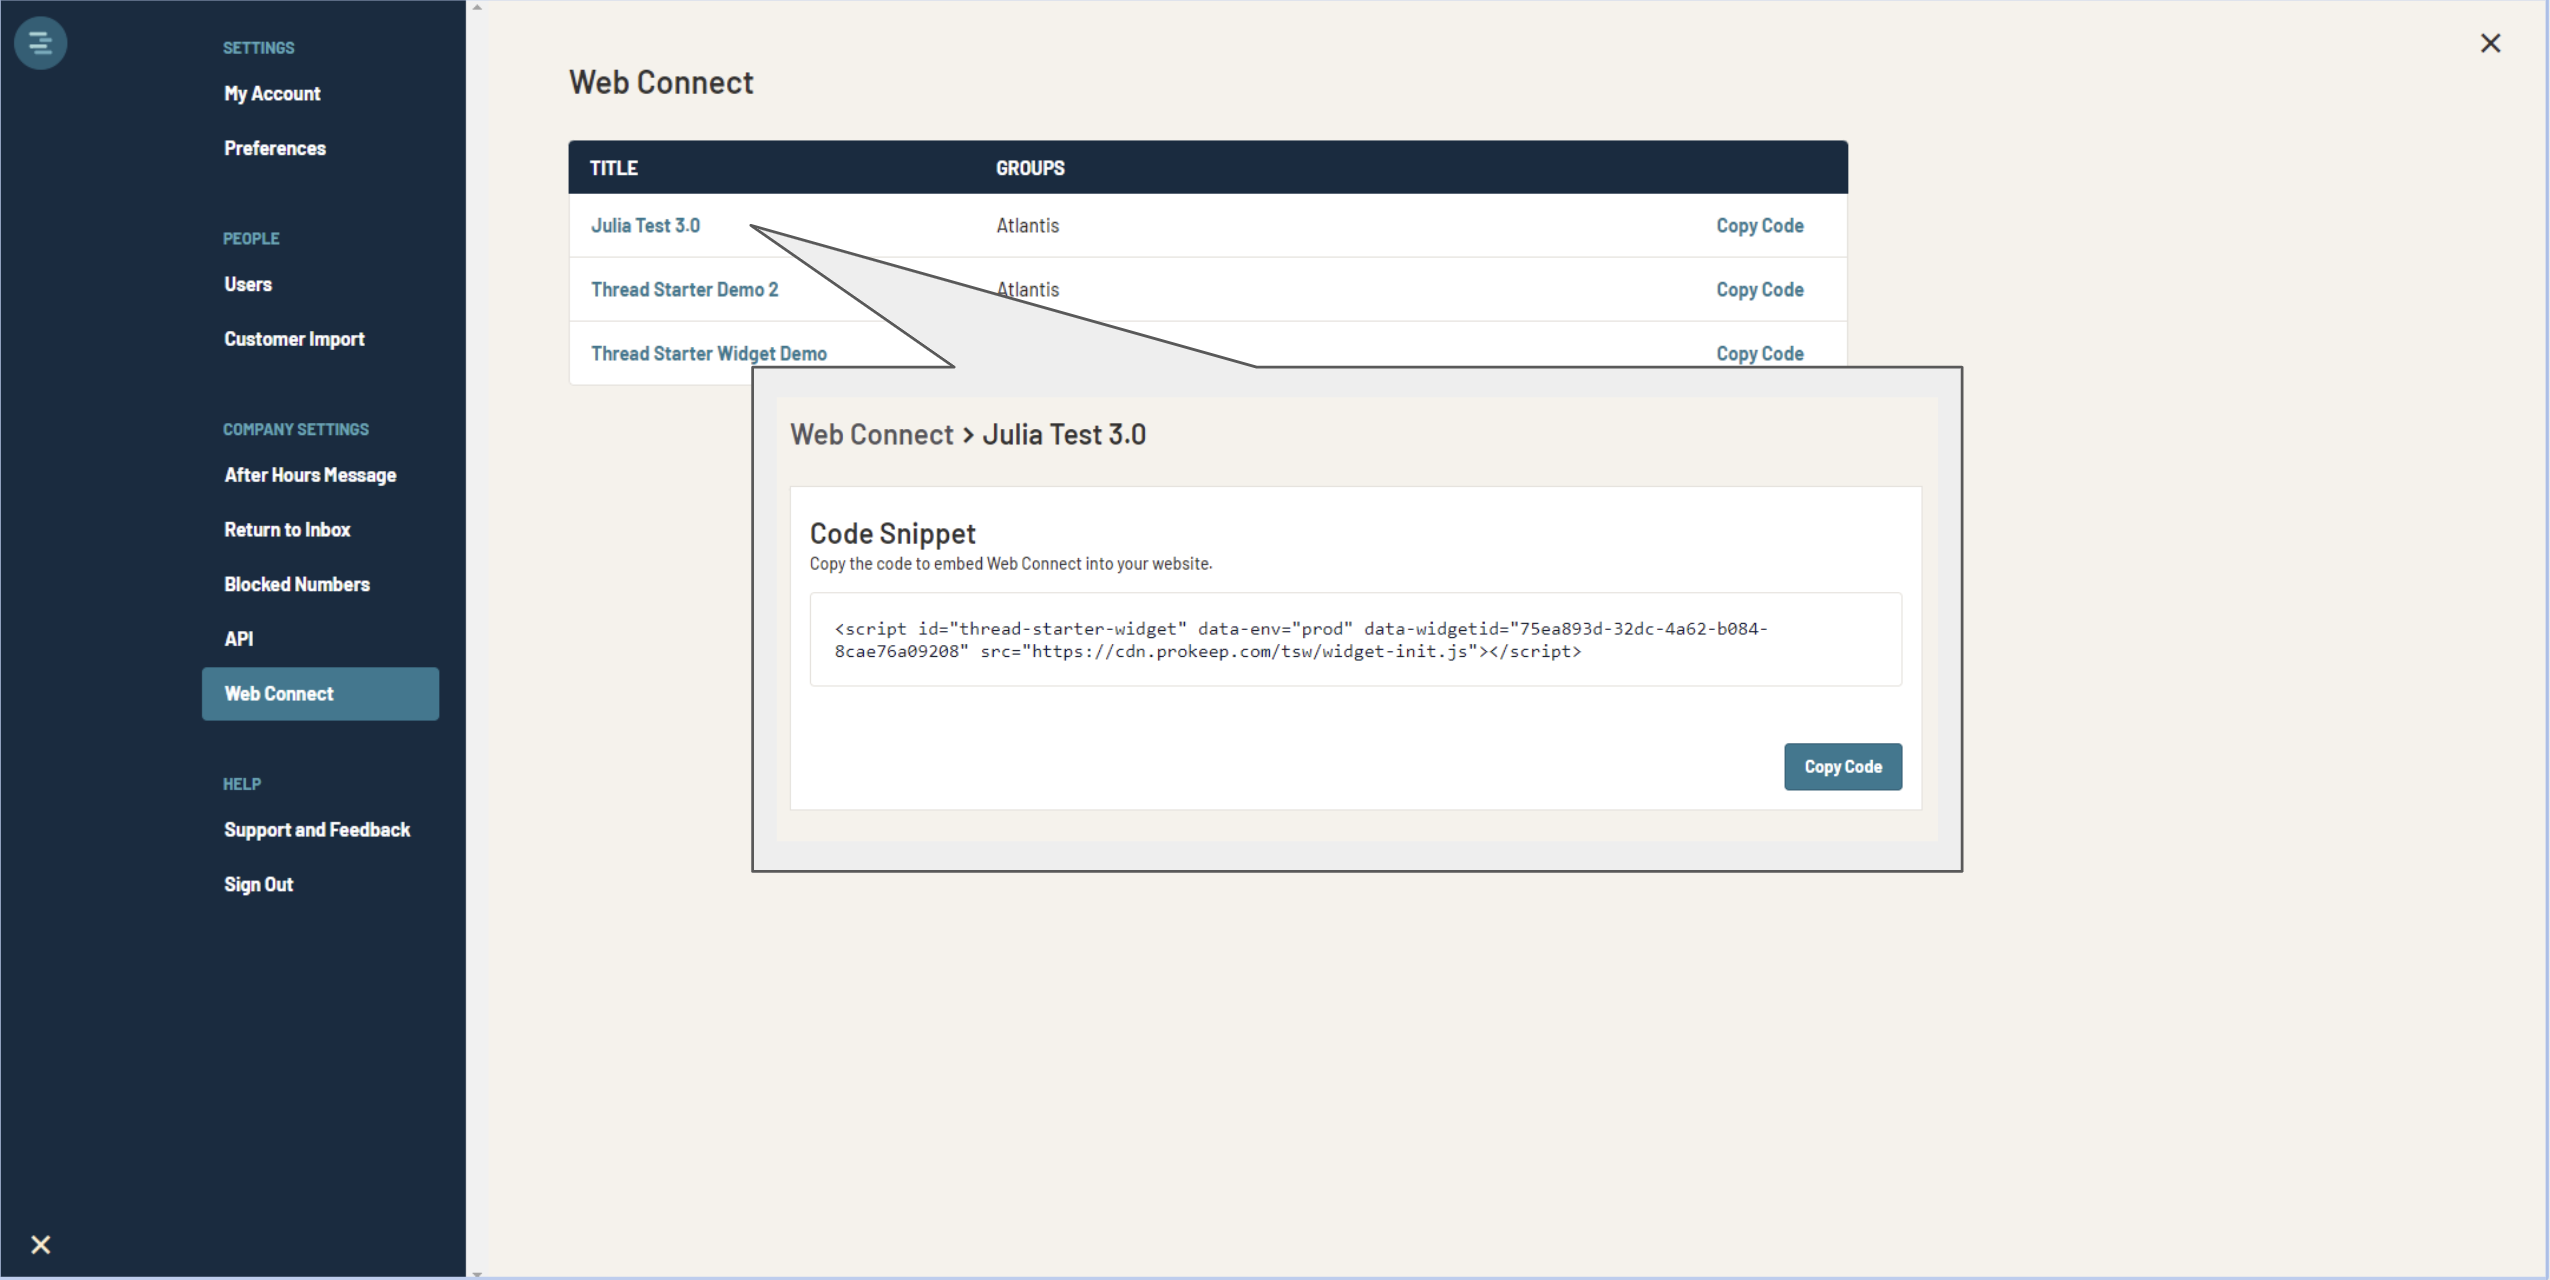
The Web Connect code can be added to any webpage by adding it to the HTML document for that page. Please note that the widget will only appear on pages that it has been added to, though this may vary based on the code structure of your website. It is recommended that the widget code is pasted near the top of the document, where the CSS or other external resources are loaded. This will allow the code snippet to be easier to find if changes need to be made in the future.
Please see an example of the code below:

The Web Connect widget will then appear on that webpage:

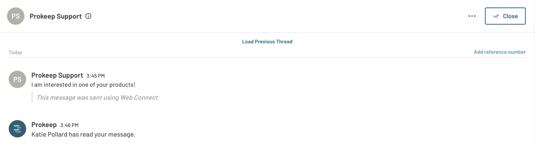
Using the Web Connect Widget
Anyone can send a message to your Prokeep through the Web Connect widget, but the messages are just starting an SMS thread, similar to existing customer threads. So in order to send a message on the thread starter, the customer needs to enter a phone number. To prevent spam, clients are sent a verification message to ensure that the person who sent the message on Web Connect is the same person who has access to that number. Customers have 24 hours to verify their number. If they indicate that they did not send that message, or if the 24 hours expire, then the message will not appear in Prokeep. As soon as the customer confirms their number, then the message appears in the target group’s inbox.
If the sender is not already a contact, then their information will be added to the contact list. If they are an existing contact, Prokeep will display their existing contact information.
Note: If a thread with that customer is already open, the Web Connect Message will be included in that thread.
Once the customer has entered their information and submitted the inquiry, they will receive a message at the number they provided asking for confirmation:
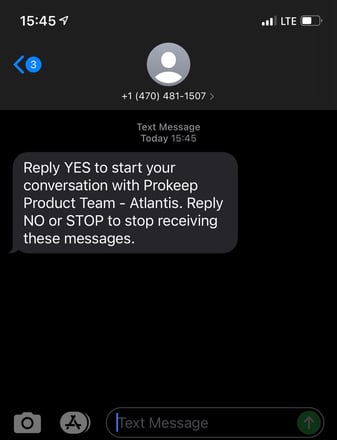
After the customer confirms by responding YES, the inquiry will be delivered into the shared inbox of the Group selected.
Add Web Connect to WordPress
Use Code Snippet Add On
We highly recommend using the Code Snippet Add On for adding Web Connect to your WordPress website.
Copy the Web Connect code from the Web Connect Page in Settings.
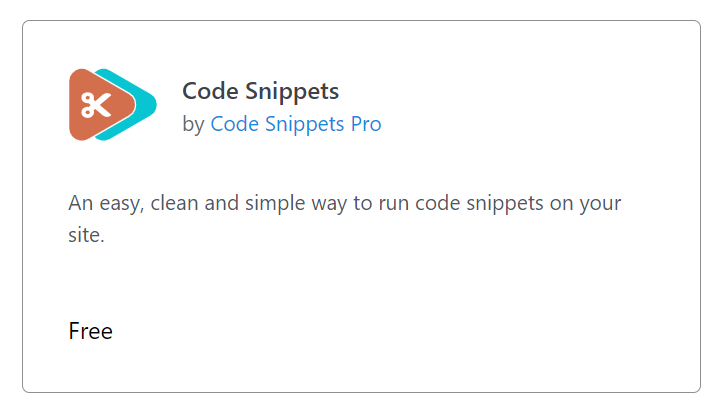
If you do not have the code snippet plugin already, go to Plugins. Search for “Code Snippets”
Select this option:
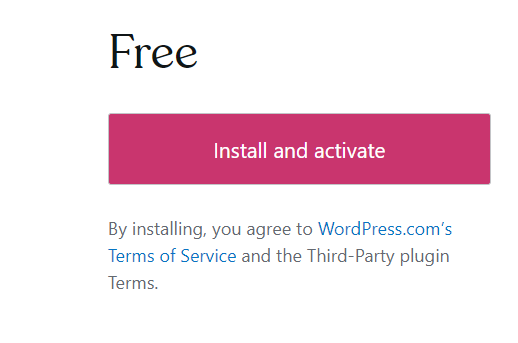
Click “Install and Activate”
Once you have the Code Snippets plugin activated, you will see a “snippets” option on the left side menu. It will appear under plugins. Please click on it.
Look for “Example JavaScript snippet”, click Clone.

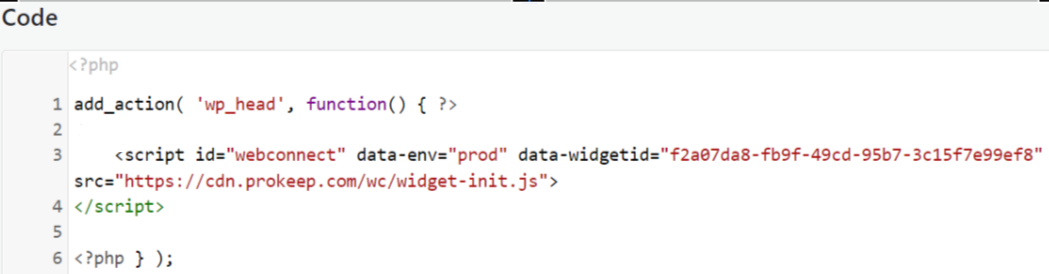
Now go ahead and click Edit on your clone. Highlight all the text between <script> and </script>, including the script tags themselves. Delete this content and paste into the Web Connect code here.
Your code should look like this now:
Save your changes and Activate your snippet.
Web Connect will now appear on your website.
Turning off the Web Connect
If you need to disable Web Connect, you may simply remove it from any active web pages to prevent new messages from coming in through the site. You can remove the widget by deleting the code that was added.