
Admins can create up to 20 Custom Fields for Contact records and up to 20 Custom Fields for Company records per account. These fields can be used to capture business-specific data such as deadlines or additional identifiers. These fields are available throughout the application wherever contacts or companies are created or edited.
Do not use custom fields to store sensitive information like passwords, credit card numbers and social security numbers.
- How to Create a Custom Field
- How to Access a Custom Field
- How to Disable a Custom Field
- Additional Details
- Tips & Best Practices
Prerequisites
-
You must have Admin access to create or manage Custom Fields
- Custom Fields are available for Contact and Company records.
How to Create a Custom Field
Contact:
- Navigate to Settings
- Click Custom Fields to open the Custom Fields page.
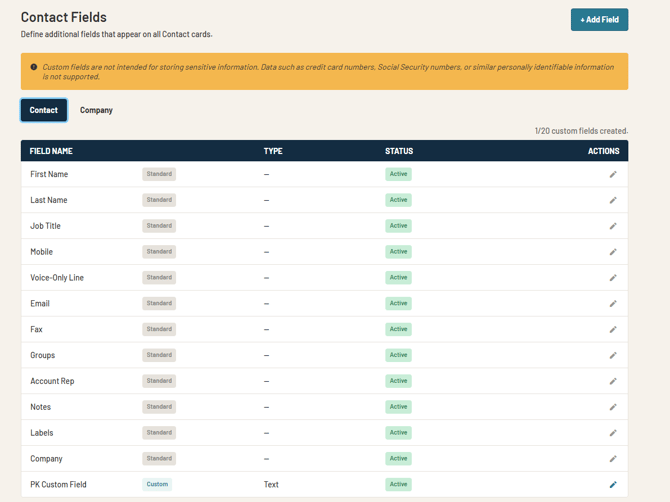
- Select the Contact tab or the Company tab.
- Click the “+ Add Field” button. The “Add Contact Custom Field” will appear as shown:
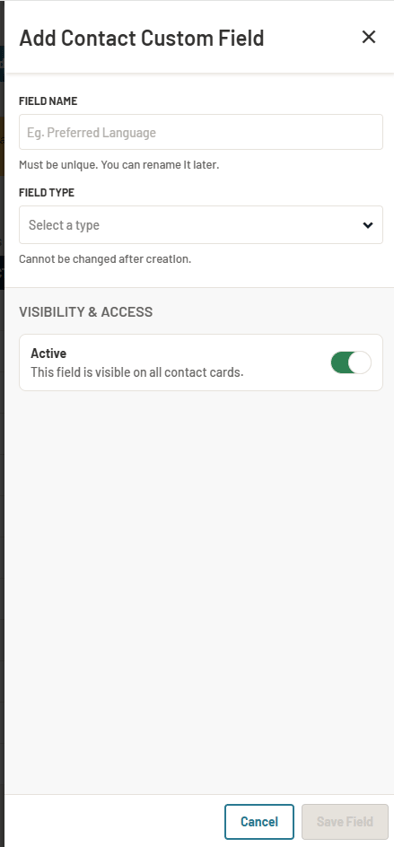
- In the Add Contact Custom Field form, enter the following details:
- Field Name
- Field Type (Text, Date, or Phone Number)
- Visibility & Access (controls whether the field is shown on contact records)
- Note: The Field Type cannot be changed after the field is created.
- Then click on “Save Field”.
Company:
- Navigate to Settings
- Click Custom Fields to open the Custom Fields page.
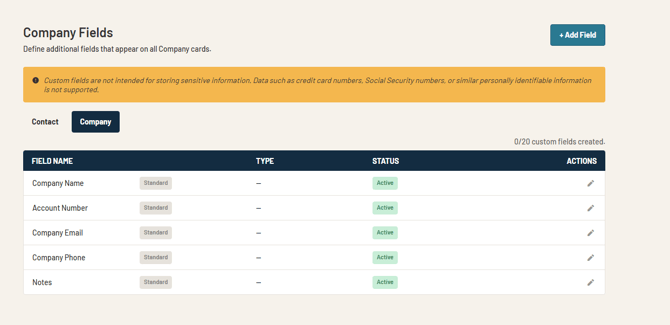
- Select the Company tab to ensure it is highlighted.
- Click the “+ Add Field” button. The “Add Company Custom Field” will appear as shown:
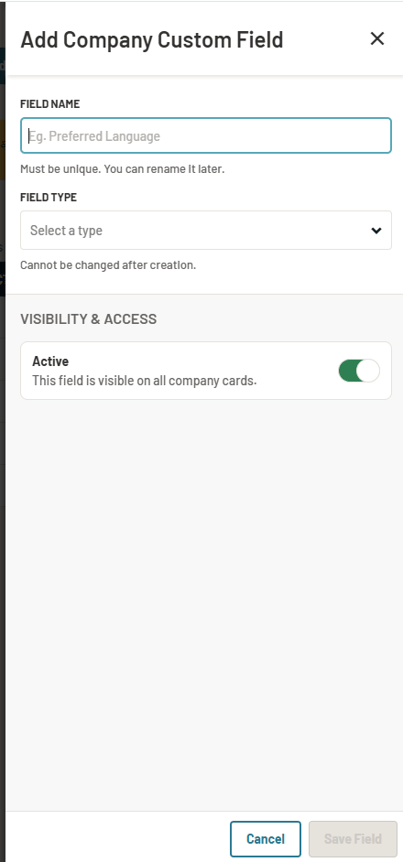
- In the Add Company Custom Field form, enter the following details:
- Field Name
- Field Type (Text, Date or Phone Number)
- Visibility & Access (controls whether the field is shown on company records)
- Note: The Field Type cannot be changed after the field is created.
- Then click on “Save Field”.
How to Access a Custom Field
Contact:
- Navigate to the Contacts page.
- Select an existing contact or create a new contact record.
For new contacts:
- In the contact creation form, locate the Custom Field you created.
- Enter the appropriate value for the Custom Field.
- Click “Submit” to create the contact with your custom field entered.
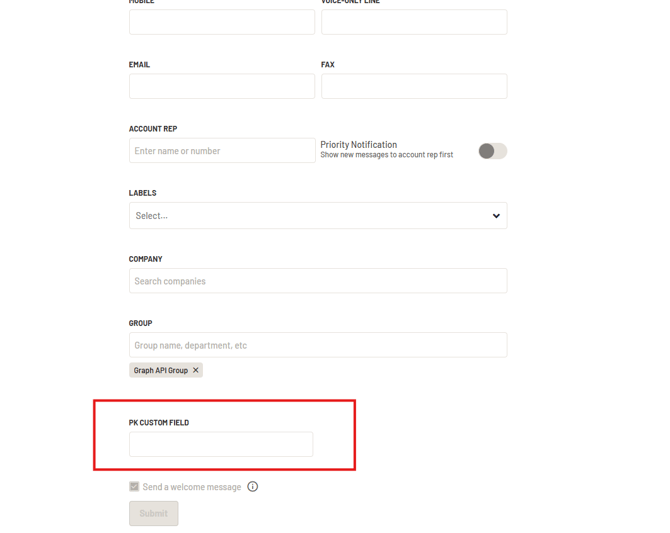
For existing contacts:
- Open the contact record.
- Click the pencil icon to edit the contact.
- Enter or update the value for the Custom Field you created.
- Click “Save.”
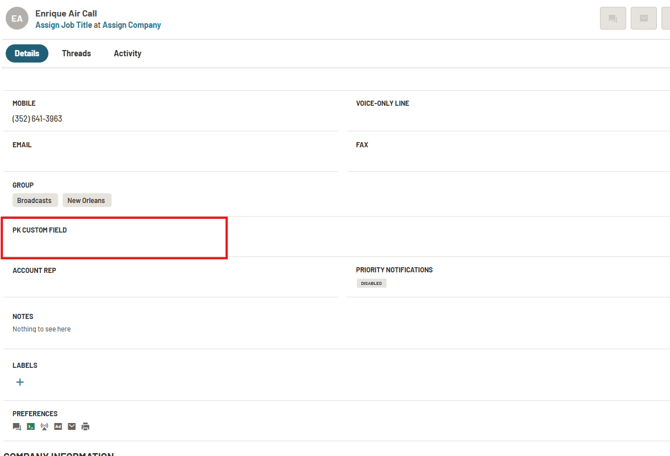
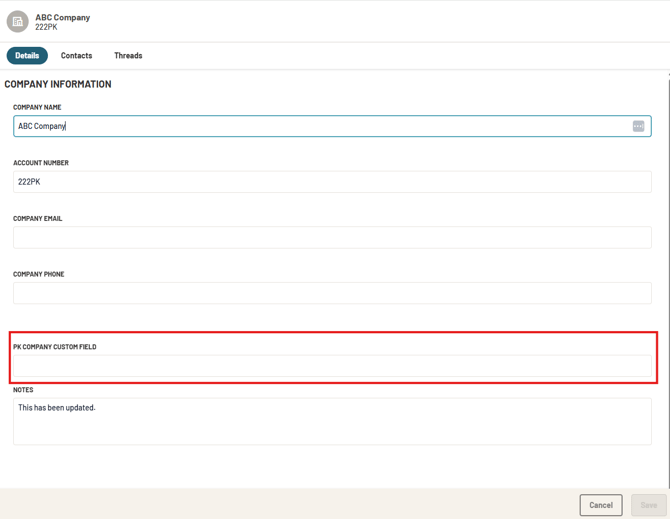
Company:
Navigate to the Contacts page
- Select and open an existing company record.
- Click the pencil icon to edit the contact.
- Enter or update the value for the Custom Field you created.
- Click “Save.”
How to Disable a Custom Field
Contact:
- Navigate to Settings
- Click Custom Fields to open the Custom Fields page.
- Select the Contact tab to ensure it is highlighted.
- Click on the pencil icon for your created contact custom field, it’s noted by the label “Custom”.
- Then it will open the “Edit Contact Custom Field” form for that custom field as shown below:
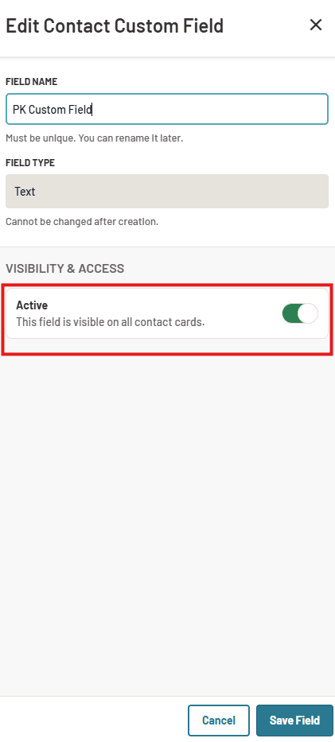
- Then you can deactivate the toggle for “Active” seen under “Visibility & Access”.
- Then click on the “Save Field” button once your changes have been made.
Company:
- Navigate to Settings.
- Click Custom Fields to open the Custom Fields page.
- Select the Company tab to ensure it is highlighted.
- Click on the pencil icon for your created company custom field, it’s noted by the label “Custom”.
- Then it will open the “Edit Contact Custom Field” form for that custom field as shown below:
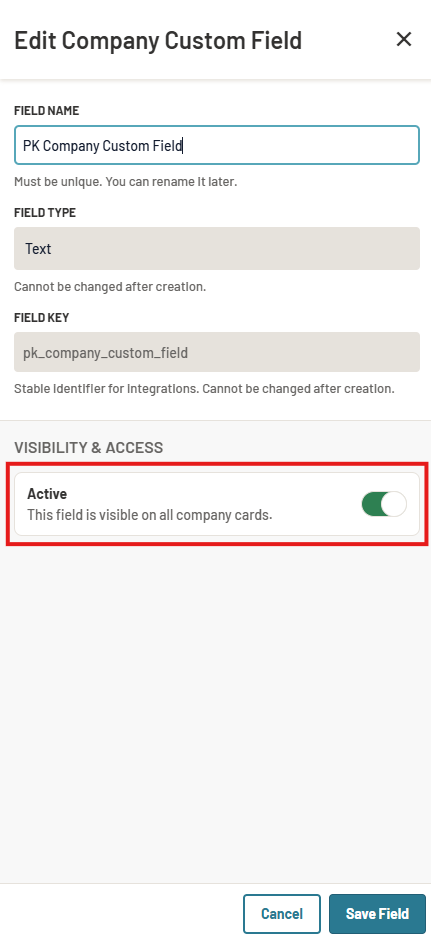
- Then you can deactivate the toggle for “Active” seen under “Visibility & Access”.
- Click on the “Save Field” button once your changes have been made.
Additional Details
- You can create up to 20 Custom Contact Fields for Contact records per account.
- You can create up to 20 Custom Company Fields for Company records per account.
- Supported field types include:
- Text
- Date
- Phone Number
- Custom Fields appear across Prokeep when viewing a contact or company.
- Custom Fields cannot be deleted once created, as any data entered into them is preserved.
Tips & Best Practices
- Do not use custom fields to store sensitive information like passwords, credit card numbers and social security numbers
- Use clear and consistent naming conventions for your fields (e.g., “Account Type”, “Region”, “Follow-Up Date”)
- Avoid creating duplicate or unnecessary fields to keep records clean and easy to manage
- Use the appropriate field type (e.g., Date for timelines to ensure consistency.)